Create a task
Tasks are the things you actually have to do — an exam to revise for, an assignment to hand in, a chapter to read. Capture one in seconds, then add a course or deadline when you know them.
- 🖥 Web
- 📱 Mobile
-
Click Tasks in the navigation. Your task list opens with an add field at the top.
-
Type the task's title in the Add a task… field. Optionally pick a due chip — Today, Tomorrow, or Next week — then press Enter (or click Add task).
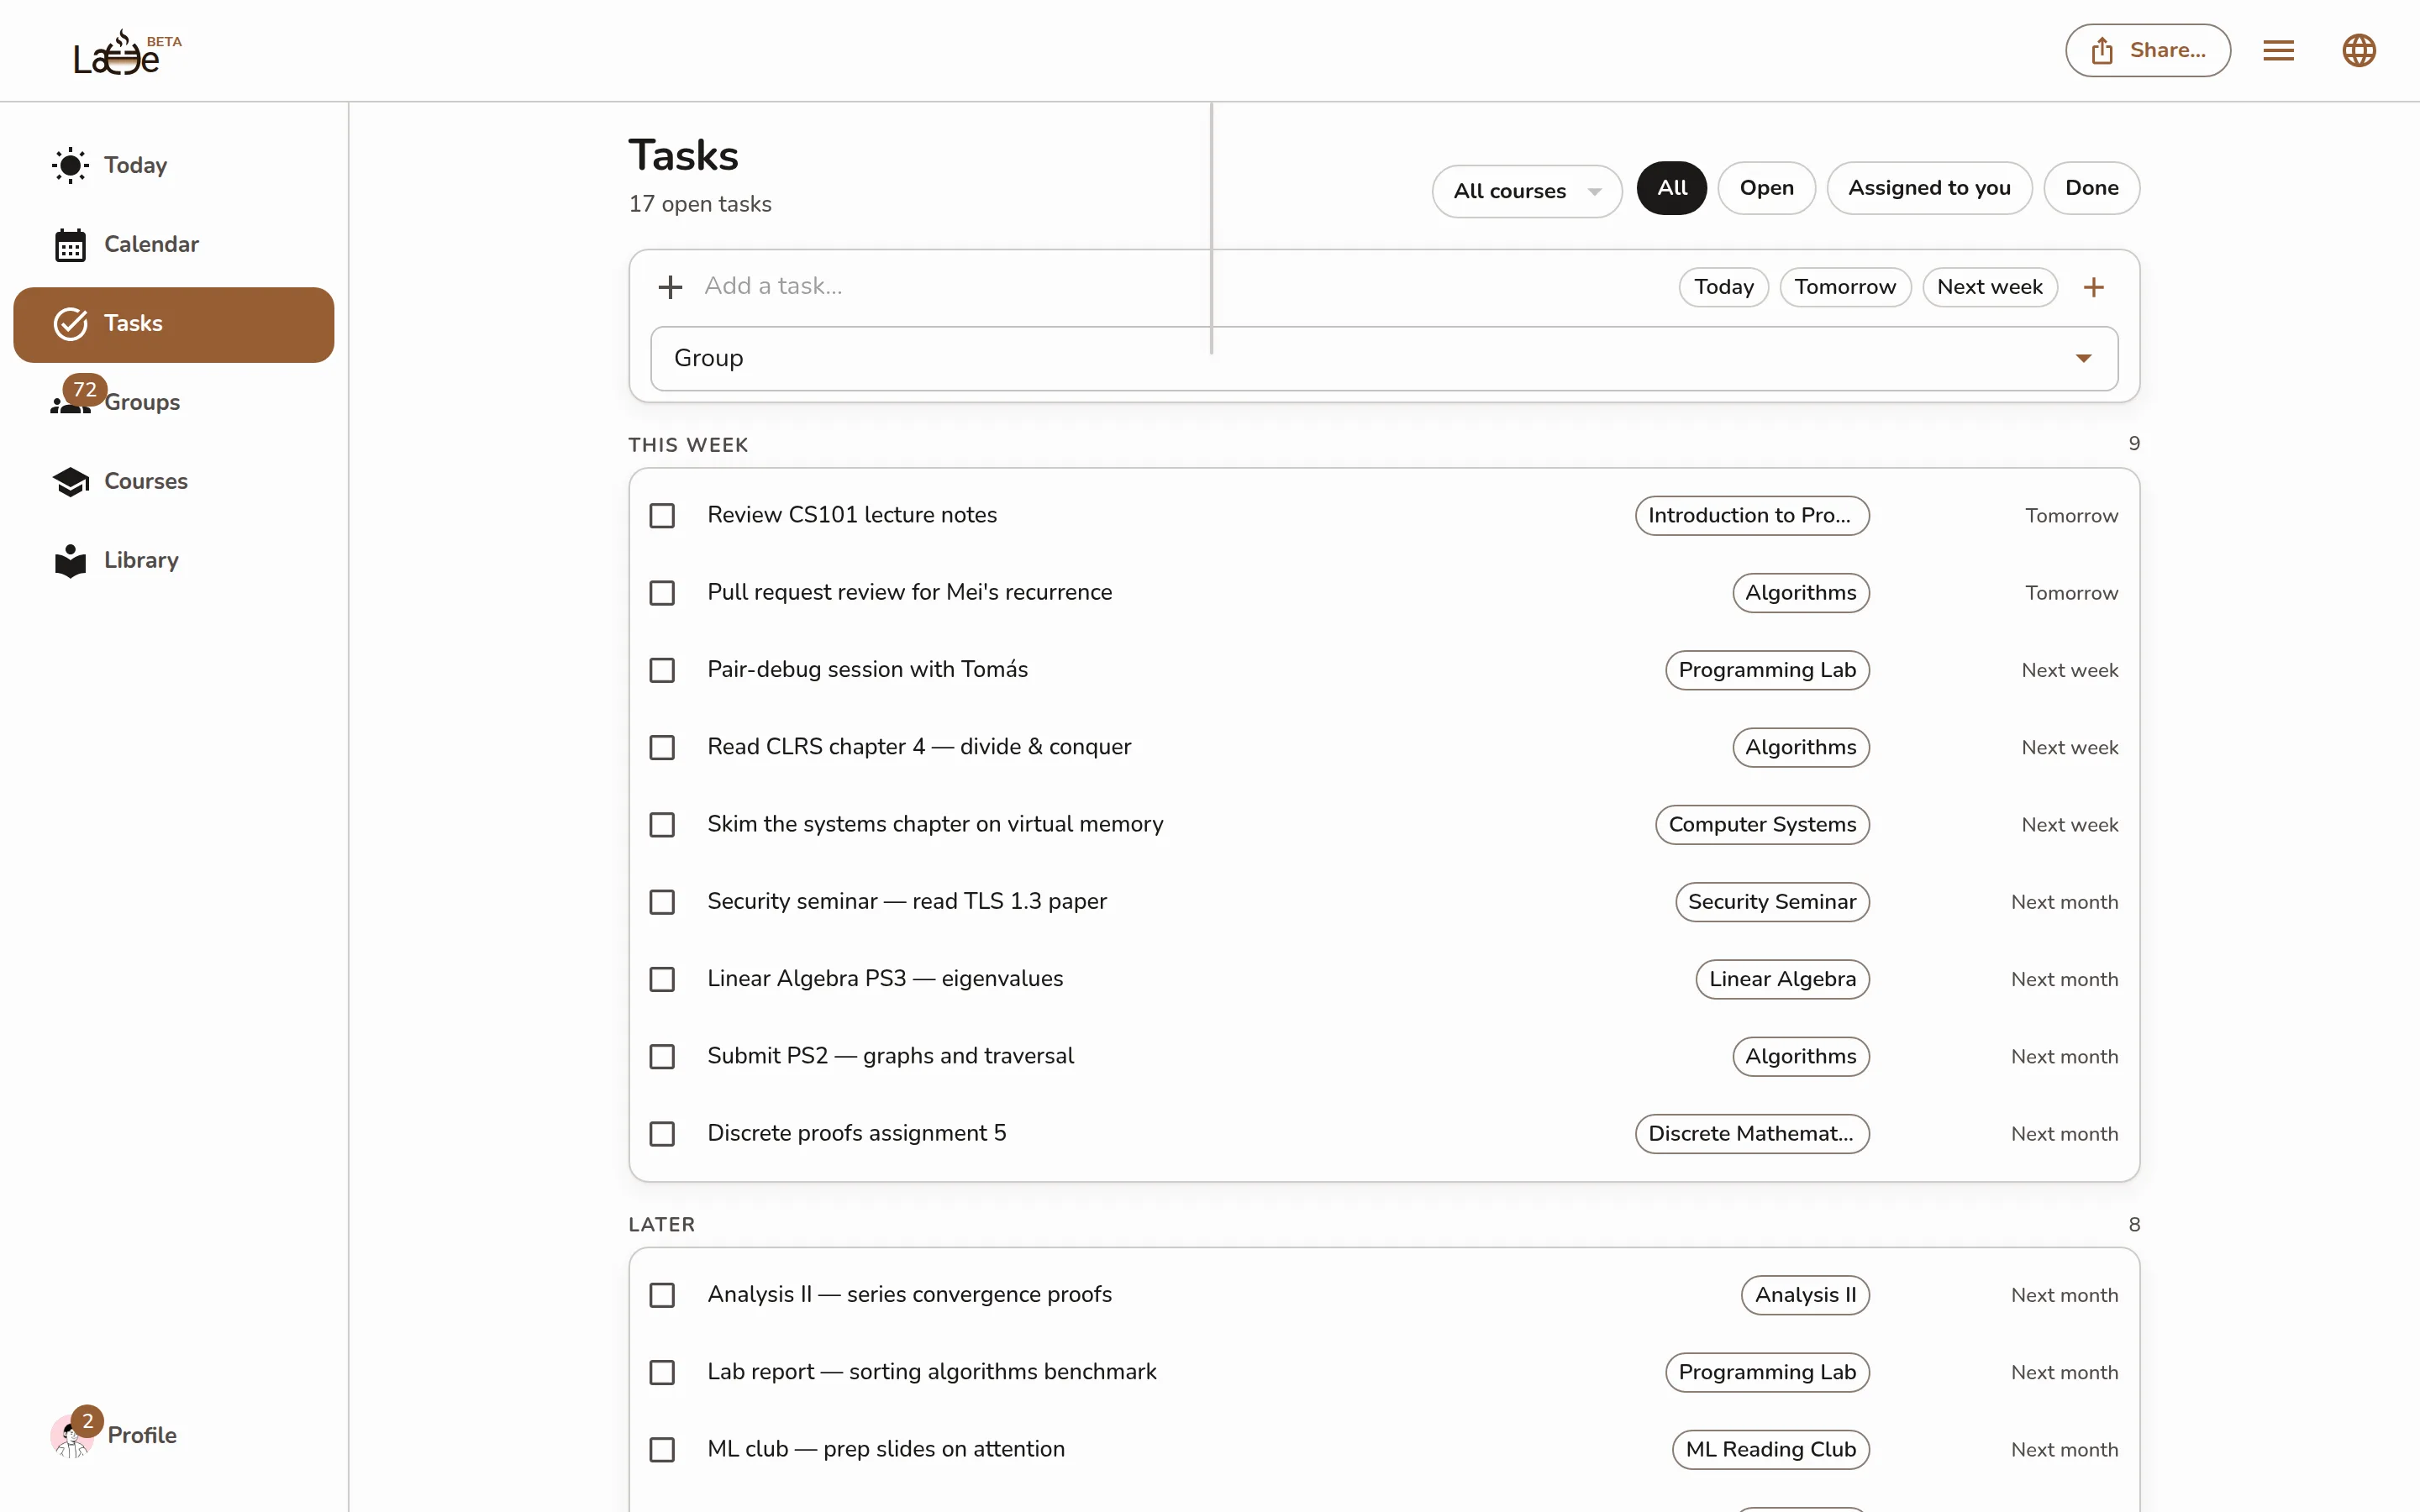
The Tasks page: the empty Add a task… field with its Today / Tomorrow / Next week due chips and the Group picker beneath it, the All courses and All / Open / Assigned to you / Done filters in the header, and the deadline-grouped task list below -
The task appears in the list straight away, filed under the section its due date puts it in — and on every device, in real time.
-
Need more than a title? Click the task to open it and add an Associated course, a Description, or a different Deadline — every change saves on its own.
The Group field under the add row shares the task with a whole group and lets you hand it to specific members. Leave it empty and the task stays yours alone. See Assign tasks to your group.
The desktop app shows the same task list and add field; tasks you create there sync identically.
On a course's dashboard, the Next tasks section has its own Create task button — the Create a Task dialog it opens is already linked to that course, and lets you pick a type (Exam, Assignment, Study, Reference, Homework, Project, or Reading).
-
Tap the Calendar tab, then the Tasks tab at the top.
-
Tap Create task to open the Create a Task screen.
-
Enter a Name for your task.
Screenshot coming soonThe mobile Create a Task screen with a name entered and the Options accordion below it -
Optionally expand Options to add a Description, link an Associated course, or set a Deadline.
-
Tap Confirm. Your task appears in the list immediately.